
Written
by A.R. Jeffery. 10.09.03

I
have written this tutorial using Psp ver 7.
Some
familiarity with the tools has been assumed but
you are most
welcome
to email me if you have any problems.
Remember
to SAVE regularly.
Supplies
PaintShopPro
download a trial version HERE
My
zip containing a gradient and images HERE
Fire,
Smoke and Sparks Tubes HERE- These tubes are no
longer available
at
The Hood but Robins tubes are being hosted at the
above link.
Thanks
Tracy.
Halloween tubes are also
available as a download from Jasc.
Psp
ver 8 users read the information on converting
these tubes.
Okay
lets get started.
Put
the 'pumpkin' gradient into Jasc Psp Gradient
folder.
Minimize
the 'bat' and 'deco' image, or tube them if you
prefer.
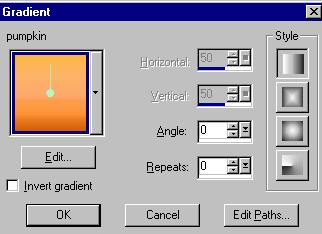
Set
your Foreground to Gradient and select 'pumpkin'.
Set
your Background to Null.
1)
Open a new image 450x450 transparent. Add a new
raster layer and name it pumpkin1.
Using
the selection tool and circle. Draw out a medium
size circle.
Flood
your circle with the pumpkin gradient with the
following settings.
Do
not deselect.
Right
click on your highlighted layer in the layer
palette and choose duplicate.
Keep
this layer highlighted.
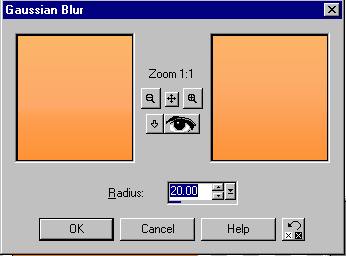
Select-Effect-Blur-Gaussien
Blur with the following settings.
Effects-Noise-Add-10%
Uniform.
Do
not deselect.
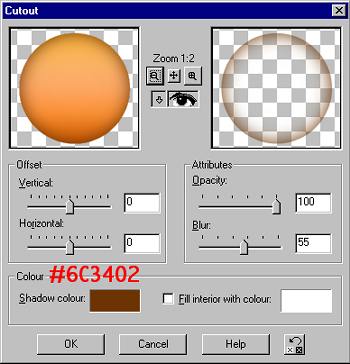
Open
a new raster layer.
Effects-3D-Cutout
with the following settings.
Layers
Merge-Merge Visible. Deselect.
Right
click on your merged layer in your layer palette
and choose Duplicate.
Duplicate
4 times-name layers Pumpkin 2,3,4 and 5.
2)
Using the Deform tool move the top
layer(pumpkin5) in towards the middle.
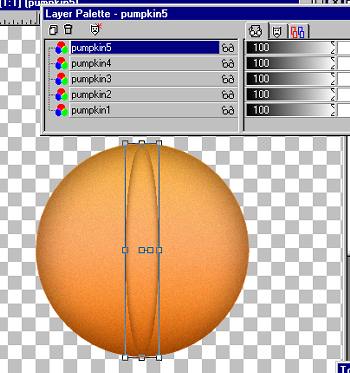
Click
apply. Highlight layer (pumpkin 4) in your layer
palette and use the Deform tool
to
squash the circle in this time making it a little
wider. Continue doing this on layer
3
and 2 each time leaving the circle a little wider
until you have an image similar to mine.

When
you have all your layers looking the way you
would like-Layers-Merge-Merge Visible.
Name
the merged layer pumpkin.
You
can export your pumpkin as a tube at this point
to use another time.
3)
Using your Selection tool and ellipse pull out an
ellipse at the top of
your
pumpkin.
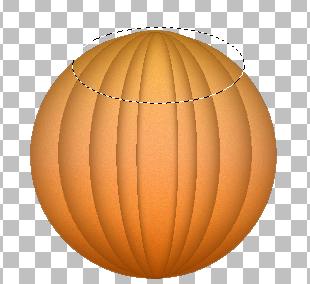
Press delete. Do
not deselect. Open a new Raster layer and name it
'inside'.
Use the Dropper
tool to select a medium shade from your pumpkin
image.
I have used
#EBA05F. Flood the ellipse. Selections-Float and
apply the following cutout
with #6C3402,
Ver 15 Hor 0 Opac 60 blur 20. Deselect and drag
this layer
below the merged
pumpkin layer. SAVE your image and if your ready,
we will move on
to the next part.
Page 2
Tutorials Home Next
Email
All
graphics and web design by Anita.
Copyright
Daydreamer.
All
rights reserved 2002 2004
|