Page 2

I
have made the eye on three separate layers.
4)
Open the eye image and decide how you would like
it before merging
Use
the Mover tool to posistion the eyeball to get
different expressions.
When
you have decided. Go to Layer-Merge-Merge
Visible.
Right
click the top of your image. Choose-Copy.
Now
open your original image of the pumpkin and make
sure you are on
the
Pumpkin layer. Right click the top and
choose-Paste as a new layer.
We
need to make the eye a little smaller. Click on
Image on the toolbar and choose
Resize.We
will use Percentage of Original and put in 80.
Make sure
Bicubic
Resample is selected from the drop down box. Take
the tick out of
Resize
all Layer and make sure Maintain Aspect Ratio is
ticked. Click OK.
Now
right click this layer in your layer palette and
choose Duplicate.
use
the mover tool to place it.
Careful
if you decide to mirror the eye. I ended up with
a cross eyed pumpkin...lol.
5)
Open a new raster layer and name it mouth.
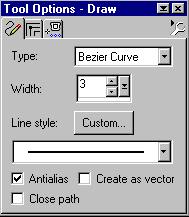
Select
the Pen tool and choose Bezier Curve with these
settings.
Draw
your line fairly high using the centre of each
eye as a guide to start and finish.
Now
click fairly low and in the centre once, then
once more to set the curve.
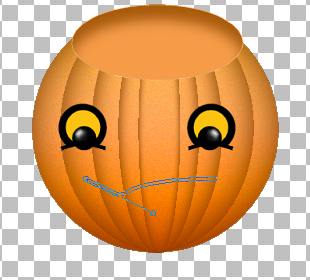
Draw
the next line across this curve from corner to
corner, click just a little
under
the line in the centre then click again to set
it. Add a short line at an angle
at
each corner of the mouth clicking in the centre
towards the mouth..
Use
the Magic Wand and select the inside of the
mouth.
Selections-Modify-Expand
by 2.
Open
a new Raster layer call it 'inside'. Floodfill
with #EB50AF. Selection-Float.
Apply
a cutout with the following settings.

Repeat
the cutout changing the vertical to -2.
Deselect.
Layer-Arrange-Move Down.
Turn
off your 'inside' layer (bottom layer) and
Layer-Merge Visible.
6)
make sure your 'inside' layer is active and open
a new raster layer, call it 'fire'.
I
used the fire tube at 55% and the smoke at 100% I
duplicated then mirrored
my
layers. When you are satisfied with it, turn off
all your layer except the smoke.
Layers-merge
visible. Then add a drop shadow, colour #795A1.
Ver-0
Horiz-0 Opac-100 Blur 8.5
Now
turn your smoke layer off and turn your fire
layers on. Layers-Merge Visible.
Add
the same Drop Shadow.
7)
Now the next step depends on what you would
prefer. You could put your name
instead
of the halloween greeting and have this as a tag.
Using
your preset shapes. Retain Style Vector and
Antialais checked.
Line
width 1.
Make
a circle just be a little larger than the pumkin.
Now
click on your text box, then hold the cursor
over
the circle next to the left center node.

until
you see the Rocking A indicating that the text
will be placed on the path.
of
the curve. Click once to bring up the Text Entry
Dialogue Box
Use
these settings.
Ensure
that Vector and Antialais are ticked. Choose a
font, I used Creepy.
Size
48, Kerning 0, Leading 0. Auto Kern checked.
Stroke
Black- Fill #FBA621. Type Happy Halloween or what
ever you would like.
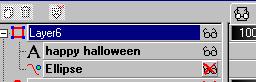
Open
your layer palette and click on the + sign beside
your highlighted vector layer.
Hide
the layer that is called 'ellipse'. Then right
click the top highlighted layer and
convert
to raster
Selections-Select
All. Selections-Float, Selections Defloat.
Effects-3D-Drop
Shadow with these settings.Ver-1 Hor-1 Opac-100
Blur-7 Black.
Deselect.
Now
it's up to you to decorate with either my images
or whatever
you
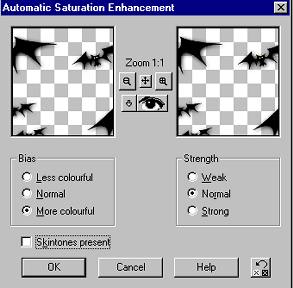
would like to use. When I have finished my images
I use the following to
brighten
up the colours a little.
I
hope you have enjoyed doing this as much as I
have enjoyed writing it.
Tutorials Home Back
All
graphics and web design by Anita.
Copyright
Daydreamer.
All
rights reserved 2002 2004
|