Welcome to my Christmas Ornament
Tutorial.
Written
by A Jeffery 15.11.02

This
tutorial assumes a working knowledge of
PaintShopPro.
To
make this you will need:-
Paintshop
Pro....download a trial version Here.
Sinedots
filter....download Here.
Superbladepro....download
a trial version Here.
My
presets zip Here
Unzip
into your enviroments and textures folder.
My
supplies zip Here
Unzip
the bows and beads. You may like to
tube
the bows. If not mimimize both images
on
your Psp workspace. Put the selection into your
selections
folder. Put the Sinedots cfg into your
plugins
folder or where ever you prefer to keep them.
Drop
the gradient into your Psp Gradient folder.
Ok
lets get started .
Remember
to save often!
Open
a new image 400x400 transparent. I like a nice
space to
work
in....Lol.Open a new layer and name it colour1.
Load
ornament.sel from your selections folder. I
realise you probably
know
how to make a circle.....Smile. I just wanted to
make sure
that
you started with one that was the correct size.
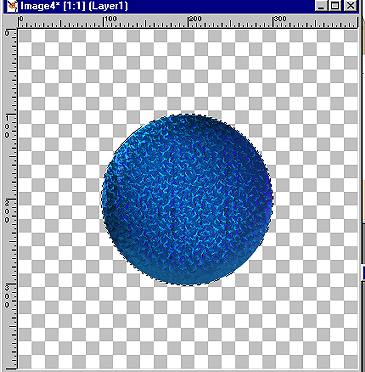
Now
colour is a matter of choice. I floodfilled with
white and then used
my
'bluesome' SuperBladePro preset just to give my
bauble a bit of substance.
Your
bauble should now look like this if you have used
my preset.
Do
not deselect. Add a new Raster layer. Call it
colour2. This is the bit I love.
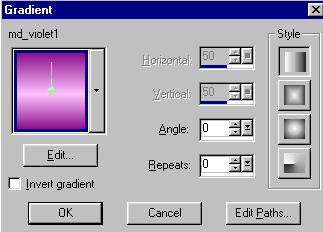
Floodfill
with a gradient. The choice is yours but it is
best kept simple.

This
is the colour I have used. I cannot remember
who's it is, if it is yours
please
let me know so I can give proper credit.
Use
it with these settings.
Now
let's play. Make sure that the new gradient layer
colour2 is highlighted.
Click
on the arrow on the far right of the layer
palette and select Hue from the
drop
down menu.
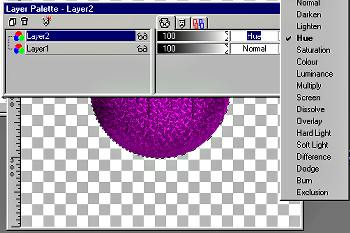
Now
depending on what colour or gradient you have
chosen
you
can achieve some wonderful effects using these
Layer Blend Modes.
In
this case I have used Hue and my bauble now has a
rich metallic look to it.
(Try
other layer blend modes if you wish,some look
better than others.)
It
has also maintained its depth. If you are happy
with your choice.
Merge
these two layers Effects-Sharpen-Sharpen.
Deselect.
Remember
to save!
Page 2
Tutorials
Home
Email
All
graphics and web design by Anita.
Copyright
Daydreamer.
All
rights reserved 2002-2004
|