Christmas Ornament
Page
2.
Everyone
has their own way of doing highlights
for
globes. I like to use the Bezier Tool. I can
almost hear a few saying 'Oh no!'
I
promise it's a great tool and this is sooo easy.
Set
both Foreground and Background to White.
Highlight
your merged layer.Selections-Select all,
Selections-Float.
Add
a new Raster layer and name it 'highlight'
Select
the Draw Tool and choose Bezier Curve. Width=2.
Antialaise checked.
Draw
a diagonal line as I have in the image below.
Then click where I have placed
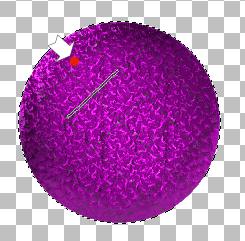
my
red dot. Roughly the center. Click again to set
it.
Keep
selected and on the same layer draw a smaller
line diagonally
opposite.
Click a the same as with the first one. Keep
selected.
Effects-Blur_Gaussien
Blur. 10.00
 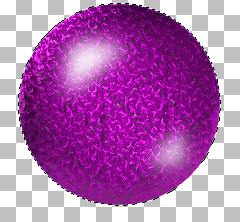
I
love the way that the highlight gives the bauble
more depth.
Open
a new Raster Layer, call it 'cage'.Goto
Effects-Plugins-Dragonfly-Sinedots 11.
Using
the box at the bottom, click Open
and find the sb_Curve1 cfg file and open.

click
on the little arrow and choose sb_LatticeSphere1
from the drop down menu.
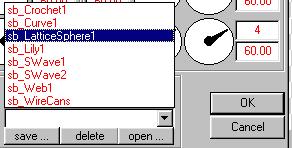
Accept
the default settings. Click Ok.
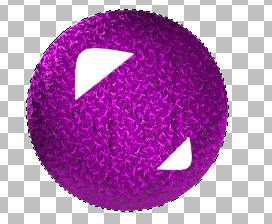
Your
lattice circle is much bigger than the bauble but
I found doing it smaller
made
it look faded. Selections-Select All.
Selections-Float.
Selections_
Modify. Expand by 1. Flood this with White.
Effects-Plugins-Flaming
Pear-SuperBladePro.
Select
my 'silverfoil2' preset.
Effects
Sharpen-Sharpen More. This is another of my
favourite tools.
It
can lift a preset to an extra level of sparkle.
Deselect.
Using
your Deformation Tool

Fit
the lattice snugly around your bauble. Effects
Sharpen-Sharpen.
Open
your 'Beads' image. Choose 'Copy' from the Edit
menu. Then right click the blue
bar
at the top of your image and choose Paste as a
new Layer. Effects-Sharpen-
Sharpen.
You may need to line it up using the Mover Tool.

When
you are satisfied choose Layers-Merge visible.
Move
your image down to leave room for our hanger and
bow.
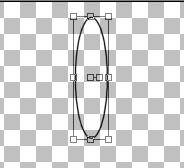
Open
a new raster Layer.
Using
Preset Shapes draw out an ellipse vertically,
similar in shape to my image.
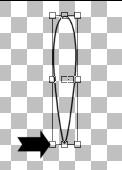
Hold
down the Ctrl key then click and hold your left
cursor on the corner of
the
vector object. Continuing to hold both pull the
bottom towards the center
as
I have.
Right
click on the 'Hanger layer in your layer palette
and select,
Convert
to Raster.
Using
your Magic Wand click and select.
Selections-Invert. Hit the delete key to
remove
the black outline.
Floodfill
selection with White. Effects-Plugins-Flaming
Pear-SuperBladepro,
Use
the 'silverfoil2' preset.
Selections-Modify-Contract
3. Hit the delete key. Deselect.
Before
moving the hanger into place, open your 'Bow'
image and Click Edit-Copy.
Then
right click the blue highlighted bar at the top
of your image and select
Paste
as a new layer.
You
will need to adjust the size using the
'Deformation Tool'
Sit
the bow on top of the bauble and highlight the
'hanger' layer. Layer-Arrange-Send
to
the bottom. Center your hanger, when you are
satisfied,
Merge
visible layers.
That's
it I hope you enjoyed doing it as much as I
enjoyed writing it.
If
you have any problems with my tutorial please
don't hesitate to E-Mail me.
Page 1
Tutorials Home Back
Email
All
graphics and Web Design by Anita.
Copyright
Daydreamer.
All
rights reserved 200-2004.
|