|
Page 2. Step
6. Use the
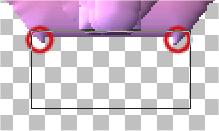
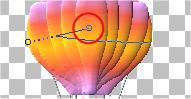
Zoom tool to move in a little closer and erase the bottom of the balloon using these settings.
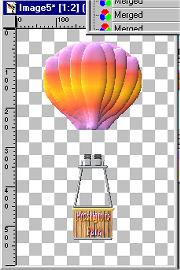
Open the 'Basket image' and click Copy. Make sure your main image is active, right click the top and choose Paste as a new Layer. Using
the Mover tool, line up the basket as it is in my image. When you are satisfied with it's posistion, Click Layers-Arrange-Send to Bottom.
Step 8.Open the 'Rigging Wires' Image. Click Copy. Make sure your main image is active, right click the top and choose Paste as a new Layer. Using the Mover Tool, line up between the Basket and the Balloon as I have it in my image.
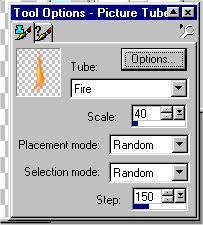
Step 9. Highlight the bottom layer 'Rigging Wires'. Add a new layer name it 'Flame'. Use the 'Fire' tube with these settings.
Apply the tube just above both burners. Layers-Arrange-Send to the bottom. Layers-Merge-Merge Visible. Step 10.Add a new layer and name it Text. Change the foreground colour to white, and tool options to solid colour.
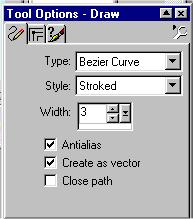
Using the draw tool with these settings.
Draw a line across the centre of the balloon. Double click just above the middle of the Bezier line.
Now click on your text box, then hold the cursor over the beginning of the white Bezier line until you see the Rocking A indicating that the text will be placed on the path of the curve. Click once to bring up the Text Entry Dialogue Box. Use these settings. Ensure that Vector and Antialais are ticked. Choose a font, I used Romaneste. Size 36, Kerning 233, Leading 0. Bold Type CIRCUS. Click Ok. You will need to nudge it slightly so that the text fits the width of the balloon. This would be a good time to SAVE |